Sailboat: Peppermint Patty
The Peppermint Patty is a scratch build of the 11'8" Summer Breeze, an award-winning design by David Beede. I've always wanted to try to build this design.
The boat is named after my mother Patricia. She never really liked the "Patty" nickname, but she puts up with it anyhow. The Peppermint part comes from the red/white color scheme.
Construction of this vessel happened over a three week period in July of 2017. I was fortunate enough to have control of the entire garage during that time so progress was faster than usual because I only had to sweep out the shavings/sawdust from the garage a few times. There was also a deadline related to our reservation on the Nantucket ferry, so productivity was at an all-time high.
It's hard to imagine a boat that has a better sailing time/building time ratio.
I had help from my family. Here we are getting started in the garage.
I used two sheets of 1/4" marine ply from the famous Boulter Marine Plywood store in Medford, MA. I am lucky to live about 20 miles from that important boat-building landmark.
Everything else was normal dimensional lumber from Home Depot. PL Premium construction adhesive (three tubes), West System epoxy, and silicon-bronze screws were used in the build.
I used the exterior chine method for speed of construction. The chine log was made by scarfing 1x2s to length and then splitting it at the correct angle to do both sides with one piece.
Inwales and quarter-knees shaping up:
Skeg improves rowing performance:
Here she is out in the boat yard ready for sand/paint.
The gunwales, inwales, and inwale spacers started off as regular 1"x2"x8's which were scarfed for length and then planed down to 5/8" thickness for improved flexibilty and a lighter look.
I made the mast partner thwart from 1/4" ply cleated on both sides. This was pretty thin (and bouncy), so I added a support in the middle for strength. This also provides stabilty to the mast.
I got lots of help from my wife and daughter on the paint job. The colors were picked somewhat randomly, but it turned out to be a great combination. Nantucket Red!
The rudder cheek was made from a 1x12 board. The rudder blade was made by laminating two scraps of 1/4" ply with an skew to avoid warping. The pivot is made from washers and a clevis pin (regular hardware store stuff). I sandwiched the lid of a round plastic take-out container between the cheek and the rudder and it works well. The pintels/gugeons are the real thing - 10% of the cost of the entire boat! I had to route insets in the rudder cheek to get the pintels to fit since the were intended for a thinner boat. I ended up adding a piece of bungee to keep the rudder blade from pivoting up - it floats really well.
The leeboard was made by laminating three 1/4" pieces of ply together. The edges were rounded to try to get a reasonable foil shape, but I've yet to experience the hull coming up out of the water. :-)
She fits nicely on the roof of a Toyota Highlander (and in the ferry!). The total weight on the roof is about 110 pounds, inclusive of spars. The car's roof rack is rated for 150 pounds, according to Toyota.
The mast is a 2x4x10' which is left rectangular for the first three feet and then rounded/tapered the rest of the way up. The mast is mounted wide side athwartships for strength - there are no stays on this boat and there is a lot of sideways pressure on the mast at the mast partner and footing, even for such a small sail. The boom and yard were made by scarfing eight 1x2x6's into four 12' sections and then joining the 1x2x12's to make two 2x2x12' (offsetting by 6" or so to make sure the scarf joints for the two sections weren't overlapping). The spars were planed round and tapered using the usual methods.
In the water for the first time! Madaket Harbor, Nantucket, MA: 41.27° N, 70.18° W.
The sailing gods spoke and the wind died completely the minute the new sailboat was rigged and ready to go. Hopefully this was a good luck omen. Spent the rest of the morning waiting/chanting for wind ...
The wind finally filled in, so the test crew (Henry) was sent out for the first sail! She is fast, light and works surprisingly well upwind.
Good reaching and downwind too.
The sail was made from a 6 mil painter's poly tarp (), edges reinforced with double-sided fiberglass carpet tape. Boltropes are used on the head and the foot. 1/2" grommets on all corners and 4 spaced along the head. There was a lot of pressure on the clew (mostly up the leech, but a lot across the foot as well) and it started to tear out on a windier day. Once ashore the clew was reinforced using some layered radial strips of Gorilla Tape and a new grommet was put in. This worked well but will need work once back home.
It turns out that a down-haul is very important to performance for this sail plan and that was added after the first few days.
In hindsight, I wish I had created reef points because there were some conditions that I had to stay in for fear of ripping out the sail. In fact, final stability is good enough that I'm pretty sure the sail would blow out before the boat would capsize.
The sail was lofted starboard side up in keeping with all relevant marine regulations/superstitions.
The view over the transom running back down into Madaket harbor after a good day out sailing in about 8 knots of breeze.
Henry headed out to sea. You can see the leeboard and the kludged clew in this picture.
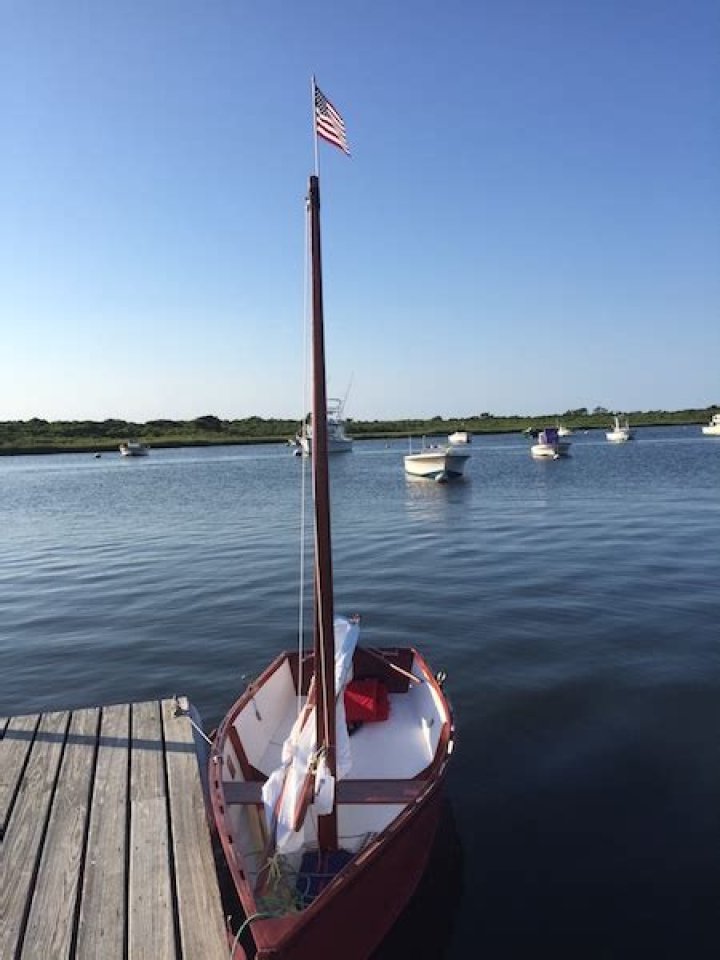
Back at the dock.
The rig is called a "balanced lug" because some of the sail is foreward of the mast. This rig is supposed to have a lot of advantages for small boats, including a lower center of effort, which means: less likely to flip over. This articleexplains the details.
Sailing late into the night ...
I estimate the total construction time was around 80 hours. Six eight-hour days on Saturday/Sunday for three weekends, 1.5 hours per evening during the weeks between, and five hours spent by the painting crew. The minimum wage in Massachusetts is $11/hour, so the total labor cost was around $900.
I estimate the total cost of materials was approximately $500 USD, inclusive of all lumber, fittings, adhesive, paint, tarps, and tape.
Photo credits Isabella MacKinnon (c) 2017